
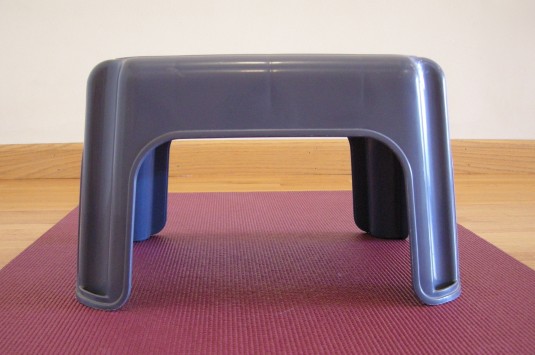
So lovely. All it needs is an 'I heart little plastic stools' bumper sticker.
It is unlikely that little plastic stools will ever take on the iconic status that’s afforded to chairs in Iyengar yoga. You need only look at Eyal Shifroni’s amazing new book, A Complete Guide to Iyengar Yoga Practice with a Chair, to see in how many ways the little stool would fall short. (And please, if you have any interest in yoga, do order a copy. Mine is already in the mail.)
And yet, and yet, I think we ought to at least make some bumper stickers that read: “I heart little plastic stools.”
Stools are inexpensive, widely available, small, and two take up no more space than one. They also pinch hit as useful objects in everyday life. Outside of yoga time, you can use them to get things down from high cupboards, or to reach just a little higher with the paint roller.
They give great stability in standing poses, and a chance to add more height if needed without creating a shaky tower of bricks. As I’ve already noted on this blog, you can use them to learn correct arm action in full backbend (Urdhva Dhanurasana) or to set up an accessible entry point in Reclining Hero pose (Supta Virasana).
A sticky mat on top of the stool adds protection against slipping.
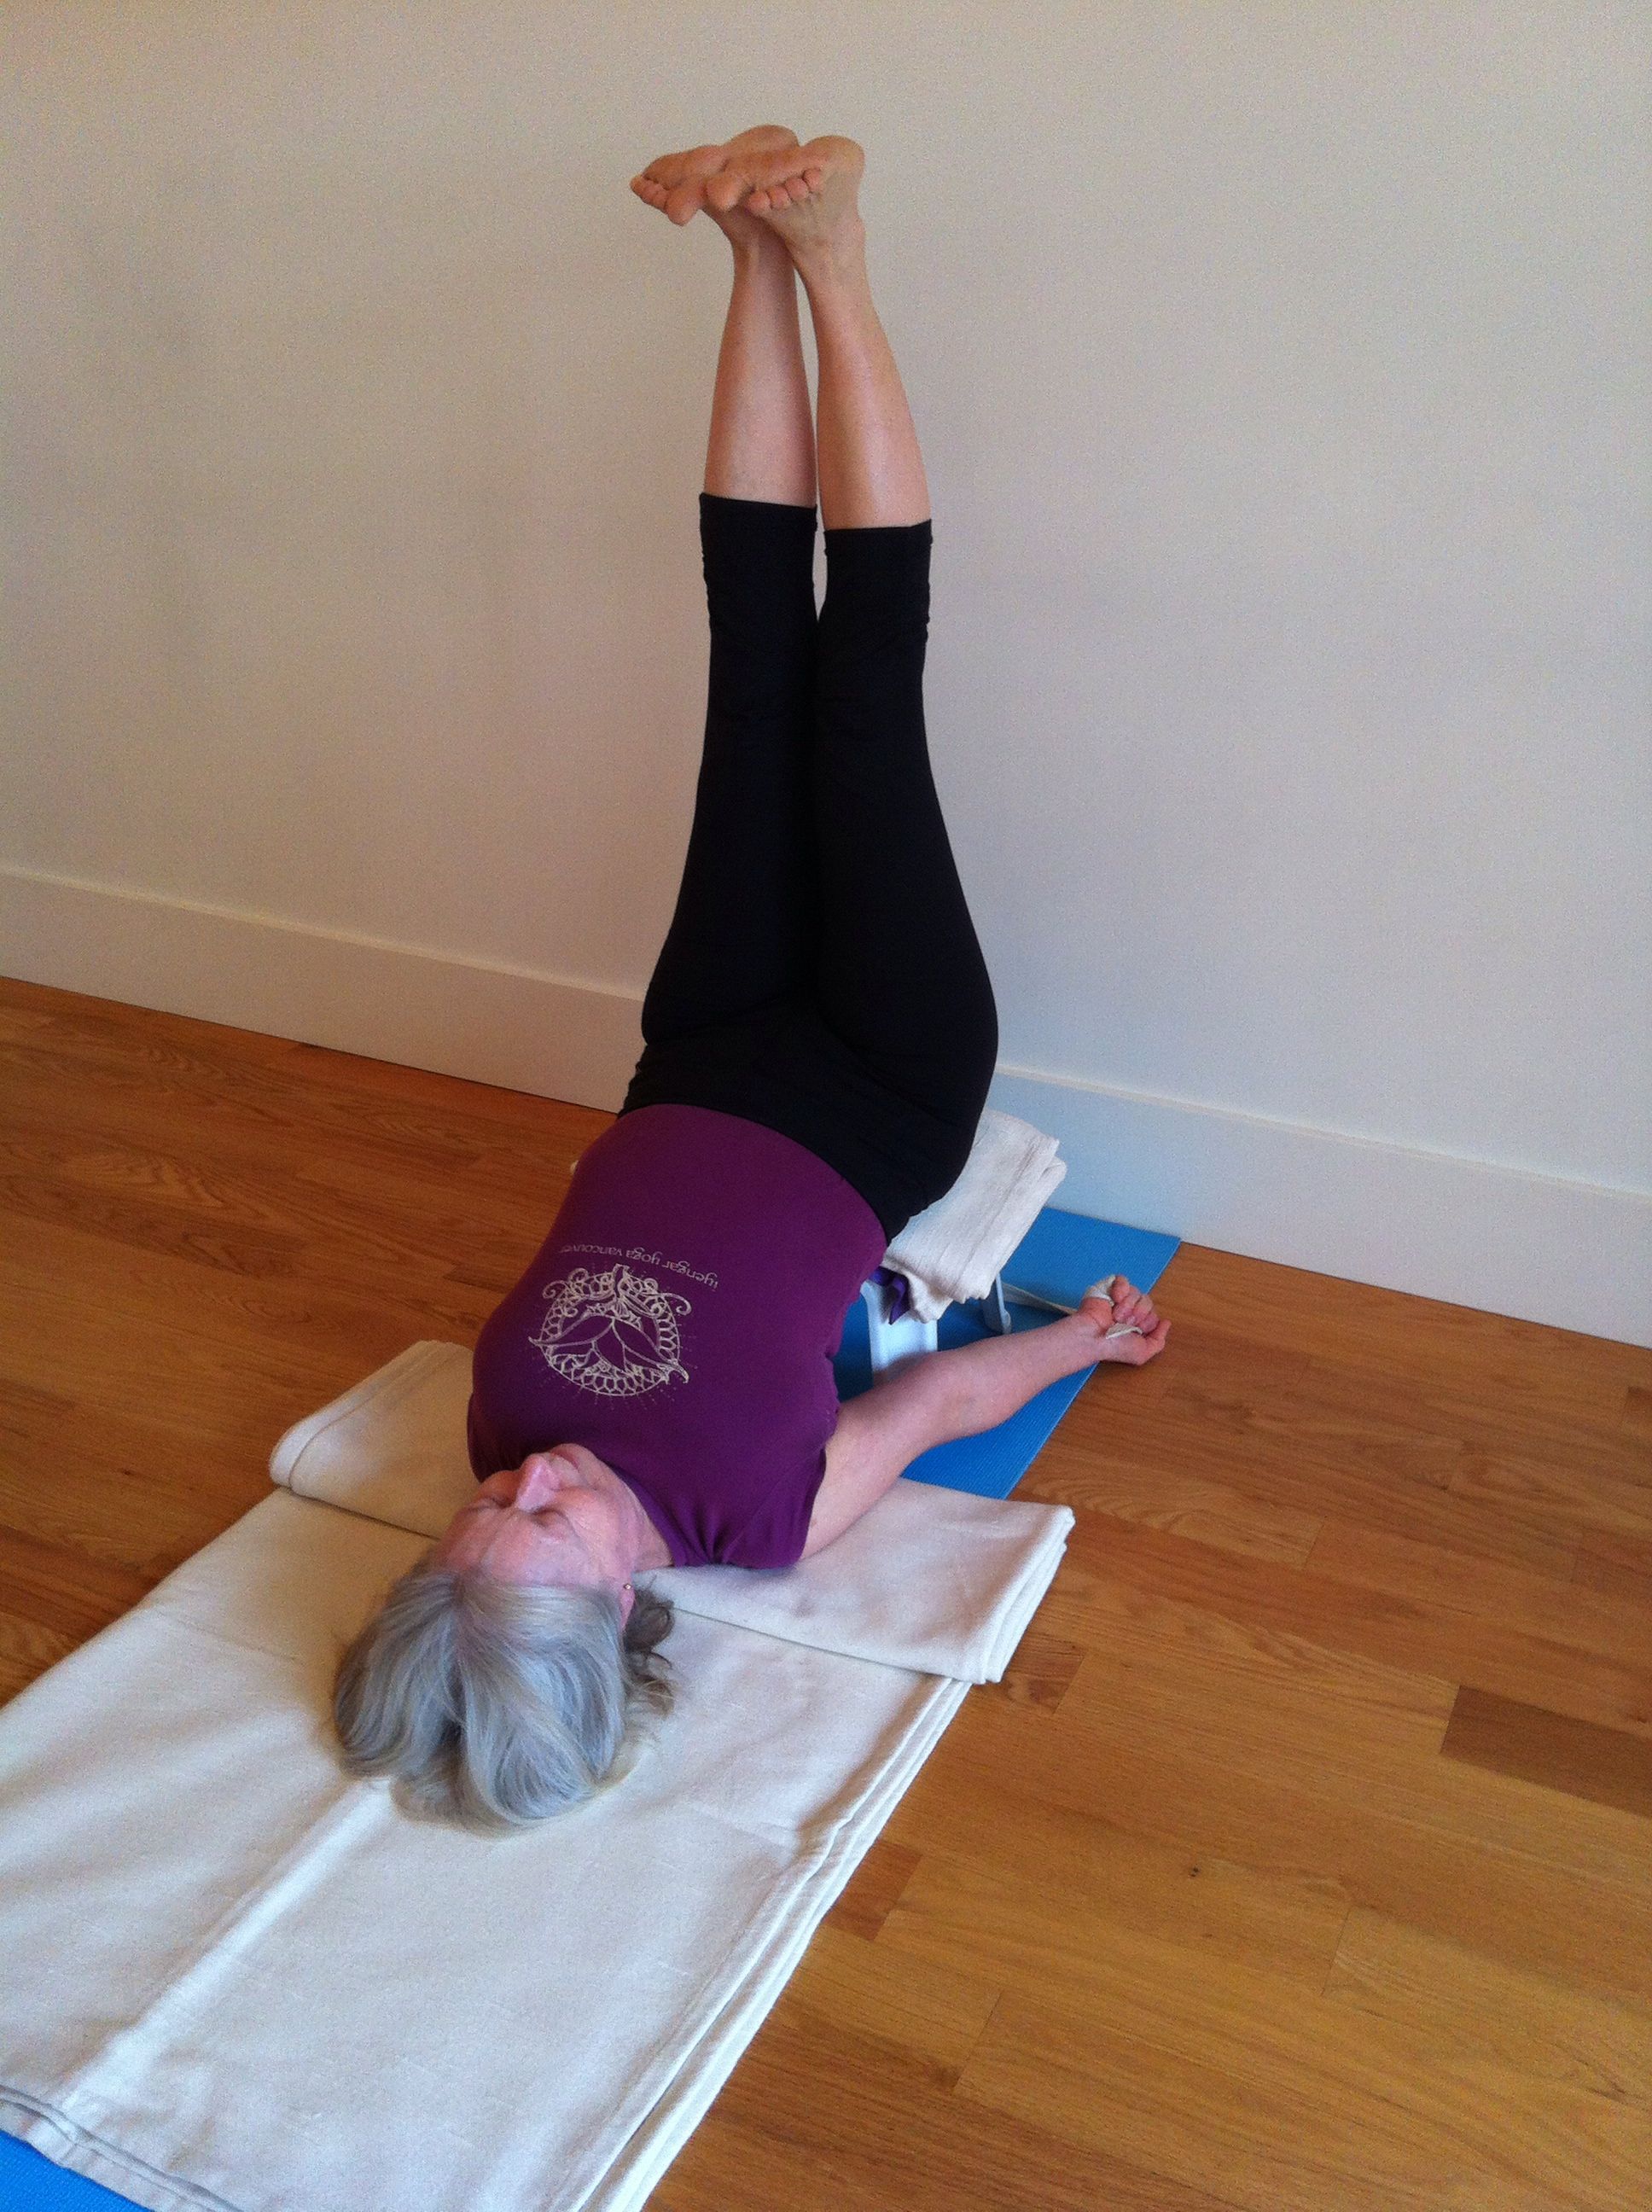
Setting up a shoulder stand preparation on a stool is like doing a ramped-down version of chair shoulder stand. For beginners it has a huge advantage: you don’t have to lower yourself down from the chair seat, a backward leap of faith that brings a chill of fear to many of us the first few times we try it.
Yet you can still experience many of the benefits of chair shoulder stand. You’re upside down, for one thing. And you can take some weight on your shoulders, but not so much that it’s too hard to get your shoulders in place. If you also use a strap, you can also learn how to rotate your upper arms enough that you can begin to bear weight your body weight on the outer edges of your shoulders. As central as that principle is to a safe shoulder stand, it’s not easy to achieve in the full pose.
Use your hands to support you as you bring your shoulders to the floor.
Best of all, using the stool is a baby step toward shoulder stand that you can practice at home without fear. Nothing could be more useful for releasing your shoulders, changing your mental attitude, and preparing you to learn what is arguably the single most beneficial yoga pose.
What if you already do an independent shoulder stand in the middle of the room, and happily hang off the back of a chair? What does this mini version have to offer you?
You may have heard that shoulder stand teaches Jalandhara Bandha, the chin lock that you need to work safely with seated pranayama. But unless your shoulder stand is very strong, you may struggle for years before the arm action of shoulder stand is really clear in your body. The very top of your upper arm bone needs to move towards the back of your shoulder socket. That pressure down helps you lift your back ribs away from the floor. In essence it’s the same action we explored in staff pose, using the arm action to activate the muscles on the front surface of the shoulder blades.
Work to bring weight to your outer shoulders and lift your ribs up and toward your chin.
The stool is especially useful here because you have you have less height under your shoulders than in a chair shoulder stand, which makes it a more accurate image of Jalandhara Bandha. And because you have less weight than in full shoulder stand, the actions are easier to do.
To do the pose:
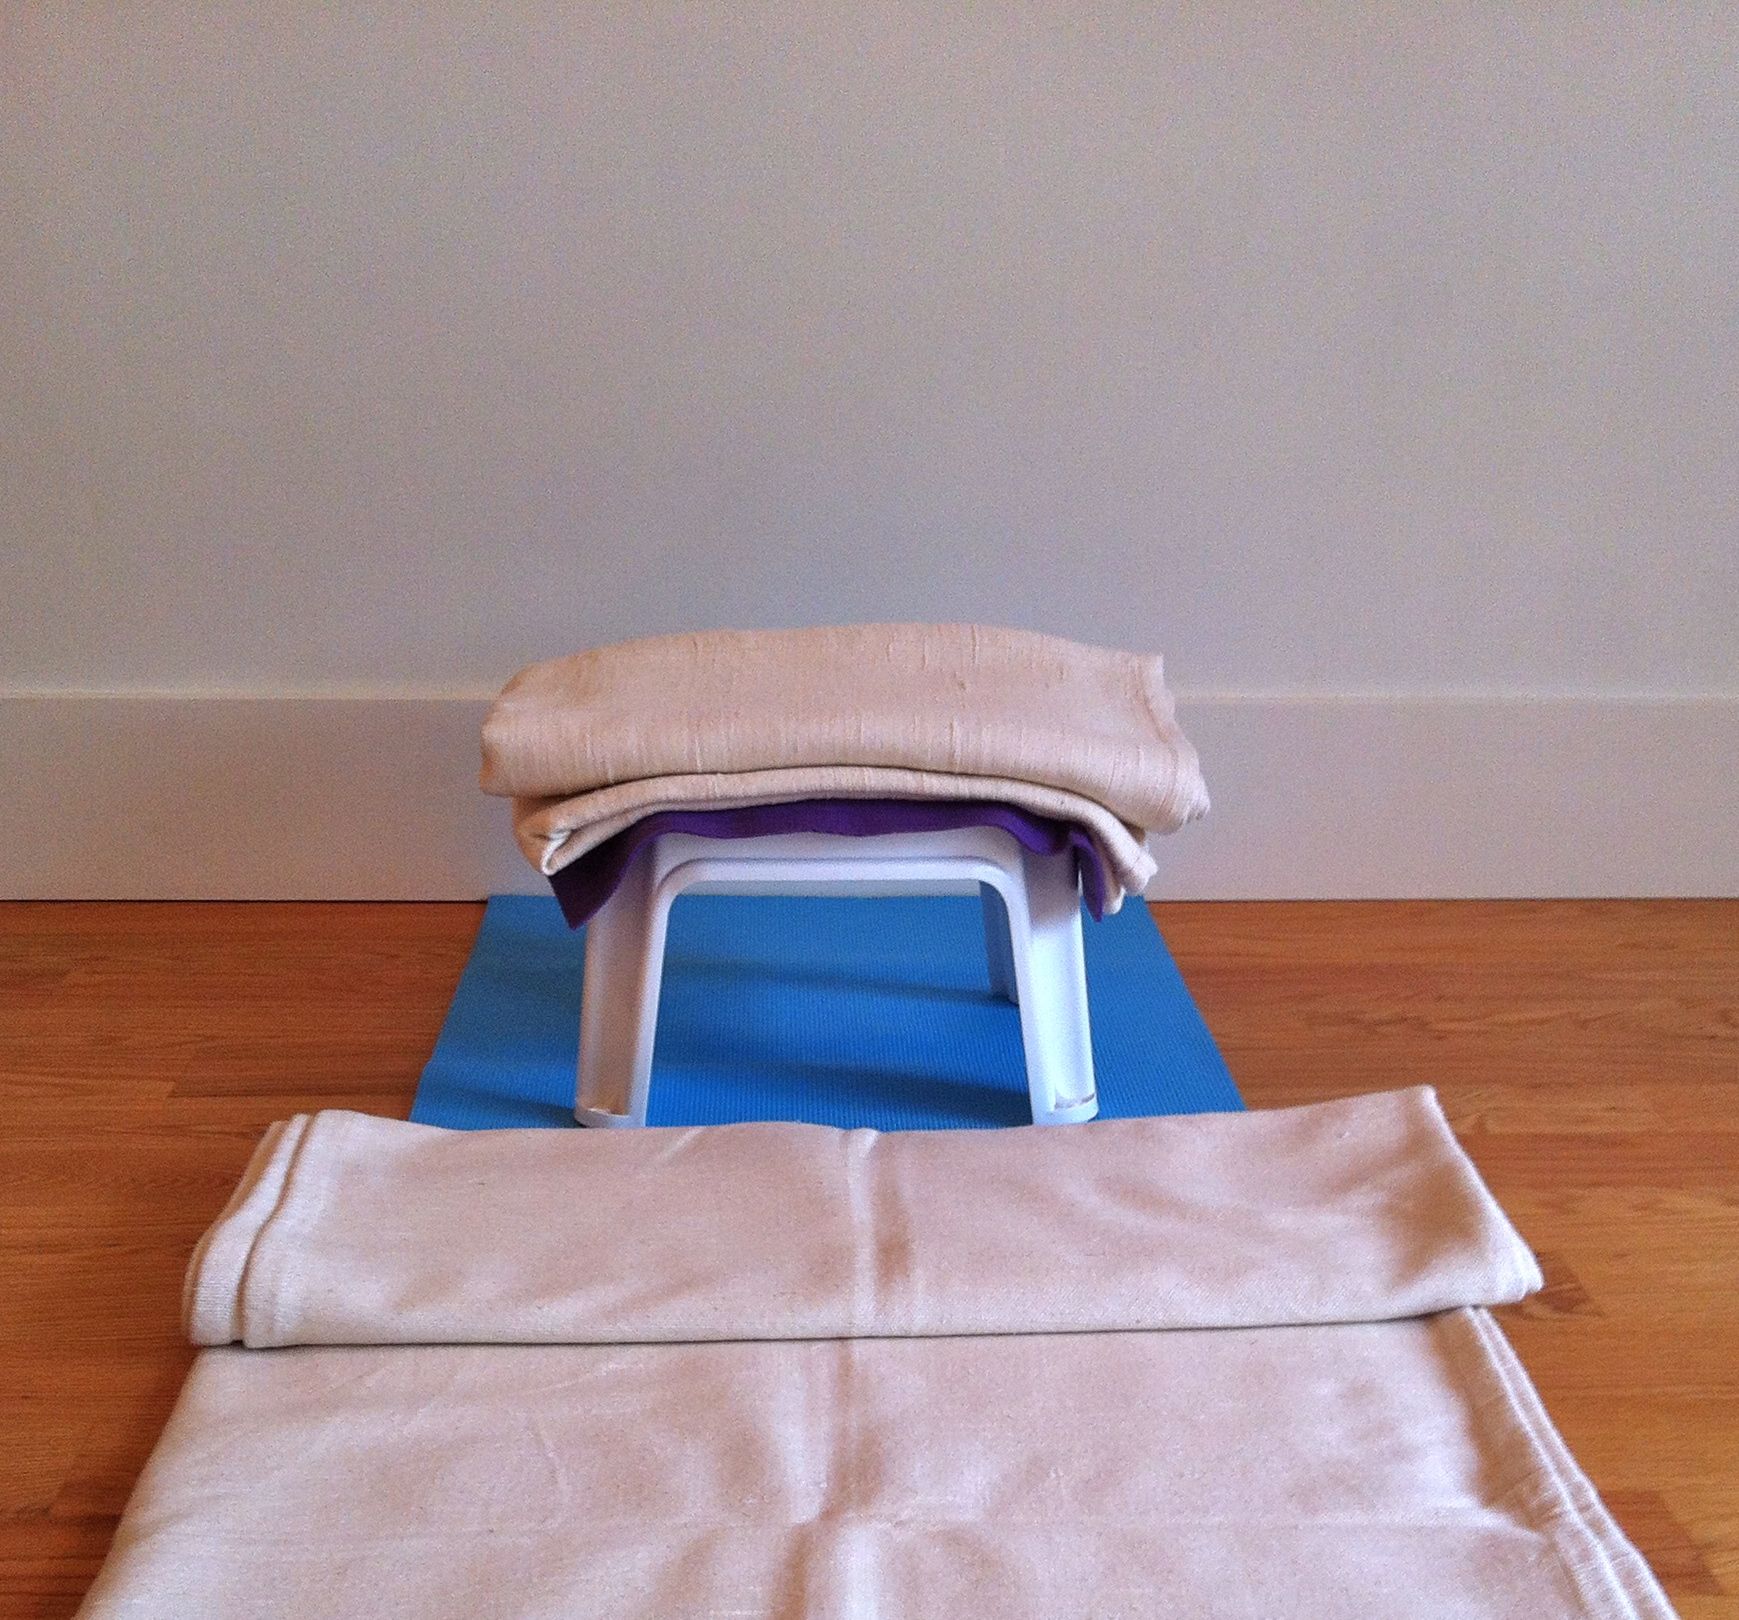
Set up your mat with a narrow end of the mat touching the wall. Place a stool about a foot (30 cm) away from the wall, with the long end of the stool parallel to the wall. Put a small sticky pad on the stool for extra insurance against slipping, and a shoulder stand blanket, folded horizontally in two on the sticky pad, to pad your pelvis.
Open a shoulder stand blanket and place it on the mat about six inches (15 cm) away from the stool. Fold a shoulder stand blanket in half lengthwise, and place it with the smooth edge facing away from the wall.
Place a strap around the wall side of the stool, with one end accessible to each hand once you lie down.
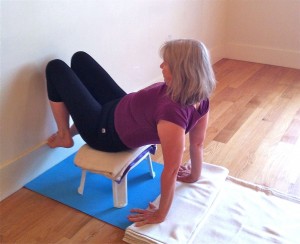
Now sit on the stool facing the wall. Your knees will be touching the wall. Lean back and bring your hands onto the floor behind you.
Then bend your elbows and slowly bring your shoulders down onto the folded blanket. You may have to adjust the blanket. It should support your shoulders, but not your neck.
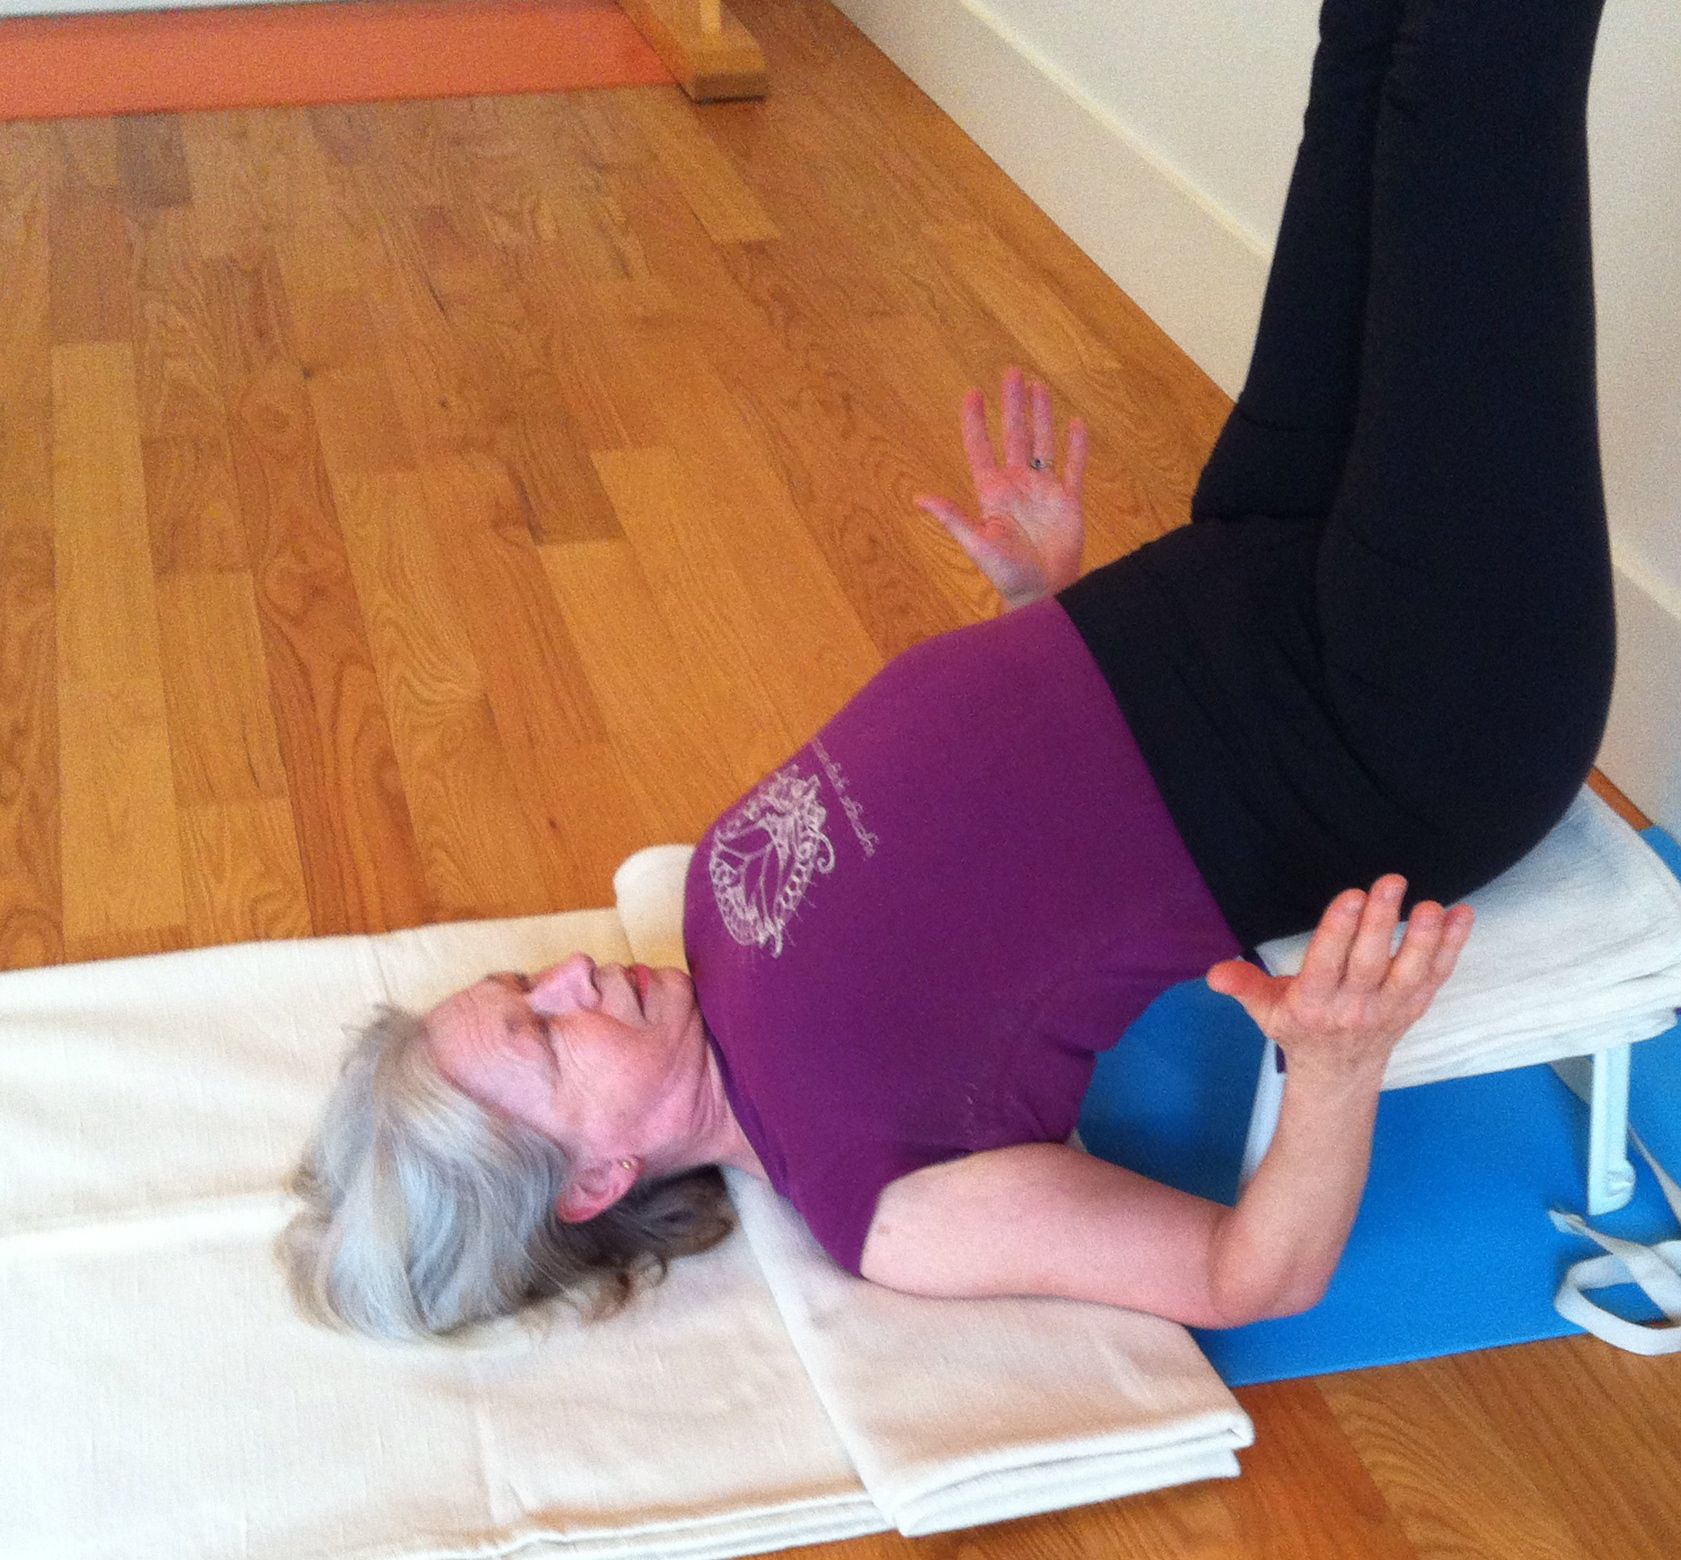
‘Take your legs up the wall, and press your heels into the wall.
If you feel uncomfortable in your neck or shoulders, come out and add another lengthwise folded blanket on top of the first, then try again.
Hold your strap and turn your palms toward the ceiling to externally rotate your upper arms.
Once you’re settled, take your awareness to your upper arm bones. Move them deeper into the blanket. Use the leverage of your arms to help you lift your back ribs away from the floor. Your elbows will be off the blanket. Instead of trying to press your elbows down, focus on having your upper arm bones move down.
Strengthen your legs. Roll your front upper thighs inward and spread the skin on the soles of your feet away from the inner arches toward the outer arches.
Wrap your strap around each hand until it’s tight, then roll your palms toward the ceiling. You will feel your biceps rolling out and your shoulders tucking under.
Straighten your legs again, and bring them to 90 degrees, soles of the feet spreading, upper front thighs rolling in.
From the very top of your upper arm, press down into the blanket. Use that pressure to help lift your back ribs away from the floor.
Keep the front of your throat soft.
Set a timer and stay in this position for as long as five minutes. Continue to check on the softness of your face and throat, and the actions in your arms and ribcage.
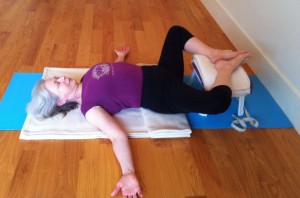
Enjoy the feeling of an open ribcage as you relax in Supta Baddha Konasana.
When you are ready to come out, slide backwards so your pelvis rests on the blanket that was supporting your shoulders. Place the soles of your feet together, take your knees apart, and rest in supine bound angle pose (Supta Baddha Konasana).
Photo credits: Photos in the pose by Baya Hammoudi.
If this was your kind of post, you might also like:
Ninety Days of Shoulder Stand: a Long and Winding Road
Success: 94 Days of Shoulder Stand and Counting
A 30-minute Shoulder Stand Practice to Reverse Late Afternoon Slump


Comments on this entry are closed.
I love your site! Thank you so much for sharing. I have an anteriorly tilted pelvis and almost no lordotic curve in my low back…no but to speak of. I find all back extensions very challenging, but this one helps. My question is…if I feel a very strong “bend in my lower back, about at waist level, do I need a lower stool?
Thank you again,
Sally
Sally,
I’m glad you find this work useful.
I think if you feel a very strong bend in your lower back at about waist level, then it would be useful to have a milder back extension. You might get a lower stool, or you could also, and maybe more easily, put more blankets under your shoulders.
This great, Eve. Thank you once again. I’d love to see all the other things you do with this stool. I will try the backbends and the supta virasana with my students.
Hi Fay,
It’s a useful prop, that little stool. I’d love to hear how it goes with the backbend and supta virasana.
You never cease to come up with motivating ideas for practice and teaching. So simple yet effective. I also keep a set of stools at a studio where I teach, so this will be a great way to demonstrate to them how this little $10 plastic prop can be so versatile. Great for entry level shoulder stand – and so much more of course. Thank you for continuing to inspire your readers.
Thanks for the post Eve. Lately I’ve been educating some coordinators at Community Centres where I hold classes with the hope of acquiring a set of stools . They are a little incredulous at first. I am forwarding the above to these coordinators as proof positive evidence of its utility in – believe it or not- Iyengar yoga!
Eve, I didn’t even finish reading your article before trying the stool myself. Fantastic! (You are sooo resourceful BTW). I don’t always have access to chairs when I teach and I have some students who tense up at the thought of Chair Salamba Sarvangasana. Next time I’m at the store I may buy several! Oh and enjoy Shifroni’s book. I cherish it. Like your blog, it enriches my practice and my teaching with skillful ways to more fully embody so many poses. Alex